
Yes, you can paint rocks for your garden! Painted rocks add a splash of color and personality to any outdoor space. This guide will walk you through everything you need to know, from picking the right rocks and paints to creating stunning garden stone art.
Painting rocks for your garden is a fun and rewarding craft that can transform ordinary stones into vibrant decorations. Whether you want to add a touch of whimsy, create helpful markers, or simply enjoy a creative outlet, rock painting ideas abound. This comprehensive guide will equip you with the knowledge and inspiration to bring your garden stone art to life. We’ll cover the essential rock painting supplies, step-by-step painting techniques, rock decorating tips, and how to ensure your outdoor painted rocks last through the seasons.
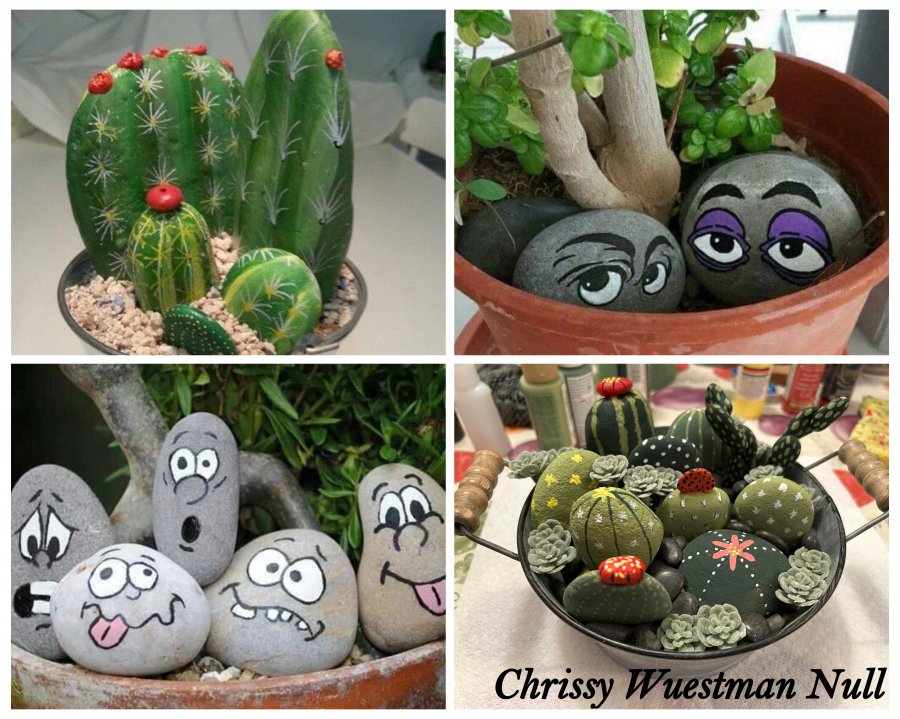
Image Source: fb-rocks.com
Choosing the Right Rocks
Not all rocks are created equal when it comes to painting. Smooth, flat surfaces are ideal for detailed designs, while textured rocks can add visual interest.
What Makes a Good Painting Rock?
- Smooth Surface: Rocks with a smooth, even surface are the easiest to paint on. These allow for clean lines and detailed artwork.
- Flat Shape: Flat rocks are perfect for designs like ladybugs, faces, or inspirational messages.
- Size: Consider where you’ll place the painted rocks. Smaller rocks can be tucked into flowerbeds, while larger ones can be used as focal points.
- Porosity: Less porous rocks tend to hold paint better. Very porous rocks might absorb the paint too quickly, requiring more coats.
Where to Find Rocks
- Your Own Backyard: Often, the best rocks are right under your feet!
- Local Parks (with permission): Always check local regulations before collecting rocks. Some areas prohibit removal.
- Rivers and Beaches: These often have naturally smoothed and rounded rocks.
- Garden Centers and Craft Stores: You can purchase smooth, clean river rocks or craft stones specifically for painting.
Essential Rock Painting Supplies
Having the right materials makes a significant difference in the quality and longevity of your outdoor painted rocks.
Paints: The Heart of Your Art
- Acrylic Paint for Rocks: This is the go-to choice for most rock painters. Acrylics are water-based, dry quickly, and are available in a vast array of colors. They adhere well to porous surfaces like rocks.
- Non-Toxic Paint for Rocks: When painting with children, ensure you use non-toxic paint for rocks. Most craft acrylics are water-based and safe, but always check the label.
- Outdoor Acrylics: For extra durability, consider acrylic paints specifically formulated for outdoor use. These are often more resistant to fading and weathering.
- Paint Pens/Markers: Acrylic paint pens are excellent for fine details, lettering, and outlines. They offer great control and vibrant colors.
Brushes and Tools
- Variety of Brushes: You’ll need a range of brush sizes. Small, fine-tipped brushes are essential for details, while wider brushes are good for base coats.
- Paint Palettes: Old plates, plastic lids, or dedicated paint palettes work well for mixing colors.
- Water Cups: Have at least two cups: one for rinsing brushes and one for clean water.
Sealing and Finishing Touches
- Sealer/Varnish: This is crucial for protecting your artwork. A clear acrylic sealant or varnish will make your sealed painted rocks waterproof and UV-resistant. Look for outdoor-specific sealants.
- Spray Sealant: Easy to apply and provides an even coat. Use in a well-ventilated area.
- Brush-on Sealant: Offers more control for detailed areas.
- Primer (Optional): Applying a white or light-colored primer can help your painted colors pop, especially if the rock has dark natural tones.
Other Helpful Items
- Paper Towels or Rags: For wiping brushes and cleaning up spills.
- Drop Cloth or Newspaper: To protect your workspace from paint.
- Pencil or Chalk: For sketching your design onto the rock before painting.
- Gloves (Optional): To keep your hands clean.
Step-by-Step Guide to Painting Rocks
Follow these steps for a successful rock painting project.
Step 1: Prepare Your Rocks
Cleanliness is key to good adhesion.
- Wash the Rocks: Use warm water and a brush (an old toothbrush works well) to scrub away any dirt, mud, or debris.
- Soak (Optional): For stubborn dirt, soak the rocks in a bucket of water for a few hours.
- Dry Thoroughly: Ensure the rocks are completely dry before painting. Moisture trapped within the rock can cause paint to peel later.
Step 2: Sketch Your Design
Planning your artwork beforehand prevents mistakes.
- Visualize: Decide what you want to paint. Consider simple designs, intricate patterns, or creating rock characters.
- Lightly Sketch: Use a pencil or chalk to lightly draw your design onto the dry rock. Don’t press too hard, as pencil marks can be hard to cover.
Step 3: Apply Base Coats
A good base coat provides a smooth canvas.
- Prime (Optional): If using a primer, apply a thin, even coat and let it dry completely.
- Apply Base Color: Use your wider brushes to apply your first color. Apply thin, even coats.
- Allow Drying Time: Let each coat dry completely before applying the next. This prevents smudging and ensures even coverage. Acrylic paints dry relatively fast.
Step 4: Add Details and Colors
This is where your design comes to life!
- Layer Colors: Build up your design by adding different colors and layers.
- Use Fine Brushes: Switch to smaller brushes for details, outlines, and fine lines.
- Paint Pens: Acrylic paint pens are excellent for adding sharp details, writing messages, or creating intricate patterns.
- Drying Between Layers: Again, ensure each layer is dry before adding more paint, especially when layering colors.
Step 5: Add Outlines and Highlights
These finishing touches make your artwork stand out.
- Outlines: Use a fine brush or paint pen to outline your design. Black or white outlines can make colors pop.
- Highlights: Add small dots or strokes of lighter colors to create highlights and give your design dimension.
- Shading (Optional): For more realistic effects, you can add subtle shading with slightly darker or lighter tones of your base colors.
Step 6: Seal Your Painted Rocks
Protection is paramount for outdoor painted rocks.
- Ensure Dryness: Make sure the paint is completely dry. This can take 24 hours or more for thicker applications.
- Apply Sealant:
- Spray Sealant: Hold the can about 10-12 inches away from the rock and spray in a light, even back-and-forth motion. Apply 2-3 thin coats, allowing each to dry according to the product instructions. Use in a well-ventilated area or outdoors.
- Brush-on Sealant: Use a soft brush to apply a thin, even coat over the entire painted surface. Allow to dry completely before applying a second coat if desired.
- Curing Time: Allow the sealant to cure fully (usually several days) before placing the rocks in your garden. This ensures maximum durability.
Creative Rock Painting Ideas for Your Garden
Let your imagination run wild! Here are some popular rock painting ideas to inspire you.
Creating Rock Characters
Transform ordinary stones into delightful characters that can greet visitors or add a playful touch to your garden.
- Ladybugs: A classic! Paint a red or orange base, add black spots, and a small black head.
- Owls: Use earthy tones for the body, add large white or yellow circles for eyes, and a small beak.
- Frogs: Green base with bulging eyes.
- Snails: Paint a colorful spiral on the rock to represent the shell.
- Bumblebees: Yellow and black stripes are instantly recognizable.
- Fish: Blues and greens with metallic accents can create shimmering aquatic friends.
- Gnomes and Fairies: Paint little hats, beards, or sparkly wings.
Inspirational and Decorative Rocks
These rocks add a touch of mindfulness or aesthetic appeal.
- Inspirational Quotes: Paint uplifting messages, positive affirmations, or favorite quotes.
- Patterns and Mandalas: Intricate geometric designs or colorful mandala patterns can be very striking.
- Faux Gems or Marbles: Use metallic or iridescent paints to create the look of precious stones.
- Abstract Art: Let colors blend and swirl for a modern, artistic look.
- Nature Scenes: Paint small flowers, leaves, or even tiny landscapes.
- Themed Rocks: Create rocks for holidays (Easter bunnies, pumpkins, snowflakes) or specific garden themes (like a butterfly garden).
Functional Painted Rocks
Make your garden both beautiful and practical.
- Plant Markers: Paint the name of a herb or vegetable on a rock and place it near the plant.
- Path Edging: Paint a series of rocks with a consistent theme or color to create a charming border.
- Garden Art Features: Large, elaborately painted rocks can serve as standalone art pieces.
- Welcome Rocks: Paint “Welcome” or your house number on a prominent rock.
Rock Decorating Tips for Lasting Beauty
Follow these rock decorating tips to ensure your creations look great year-round.
Durability and Weatherproofing
- Use Quality Materials: Invest in good acrylic paint for rocks and a reliable outdoor sealant.
- Thorough Sealing: Multiple thin coats of sealant are better than one thick coat. Pay attention to edges and underside of the rock.
- Cure Time is Crucial: Don’t rush the curing process after sealing.
- Placement Matters: While sealed rocks are durable, placing them in areas with extreme weather (like constant direct sun or heavy frost) might shorten their lifespan. Consider a sheltered spot if possible.
Design Considerations
- Start Simple: If you’re new to rock painting, begin with simpler designs like dots, stripes, or basic characters.
- Color Choice: Bright, bold colors tend to stand out best in a garden setting. However, earthy tones can also blend beautifully with natural landscapes.
- Contrast: Use contrasting colors for outlines and details to make them pop.
- Reference Images: Have pictures of what you want to paint handy for inspiration and accuracy.
Maintaining Your Painted Rocks
- Occasional Cleaning: If your rocks get dirty, you can gently wash them with mild soap and water. Avoid abrasive cleaners.
- Re-sealing: After a few years, or if you notice the paint starting to fade or the sealant wearing off, you may want to clean them and apply another coat of sealant.
Frequently Asked Questions (FAQ)
Can I use any kind of paint on rocks?
While you can technically use many types of paint, acrylic paint for rocks is highly recommended. It’s water-based, dries quickly, offers good coverage, and adheres well to the rock surface. Other paints like oil-based paints can be difficult to work with and may not last as long outdoors. It’s also important to use non-toxic paint for rocks if children are involved in the painting process.
How do I make sure my painted rocks last outside?
The key to making outdoor painted rocks last is proper preparation and sealing. Thoroughly cleaning and drying the rocks, using good quality acrylic paint for rocks, and applying multiple thin coats of a durable outdoor sealant (like a UV-resistant clear acrylic spray or varnish) are essential. Allowing the sealant to fully cure before placing them in the garden is also crucial.
What are good rock painting ideas for beginners?
For beginners, start with simple designs like dots, stripes, ladybugs, or basic patterns. You can also paint inspirational words or short quotes. Using paint pens can make it easier to create clean lines and lettering. Focusing on creating rock characters with simple shapes is also a great starting point.
Is there a specific type of sealant I should use for garden rocks?
Yes, you should use a sealant designed for outdoor use. Look for a clear acrylic sealant, varnish, or spray that is waterproof and offers UV protection. This will protect your painted artwork from rain, sun fading, and general wear and tear. Check product labels for their suitability for outdoor applications.
Where can I buy rock painting supplies?
You can find most rock painting supplies at craft stores, art supply stores, and online retailers. This includes smooth rocks, various types of acrylic paints, brushes, paint pens, and sealants. Even large discount stores often carry basic craft supplies.
By following this comprehensive guide, you can confidently embark on your rock painting journey and create beautiful, lasting garden stone art that will bring joy and color to your outdoor space for years to come. Happy painting!