
Can you record drums at home? Yes, you absolutely can record drums at home, even with a small setup and limited budget. Many successful recordings have started in bedrooms and garages, proving that passion and smart techniques can overcome expensive studios. This guide will walk you through everything you need to know to achieve great drum sounds in your own space, whether you’re a seasoned pro looking to refine your home studio drums or a bedroom drummer recording for the first time. We’ll cover drum recording setup, budget drum recording gear, and drum tracking tips to help you get the best possible results for your acoustic drum recording.
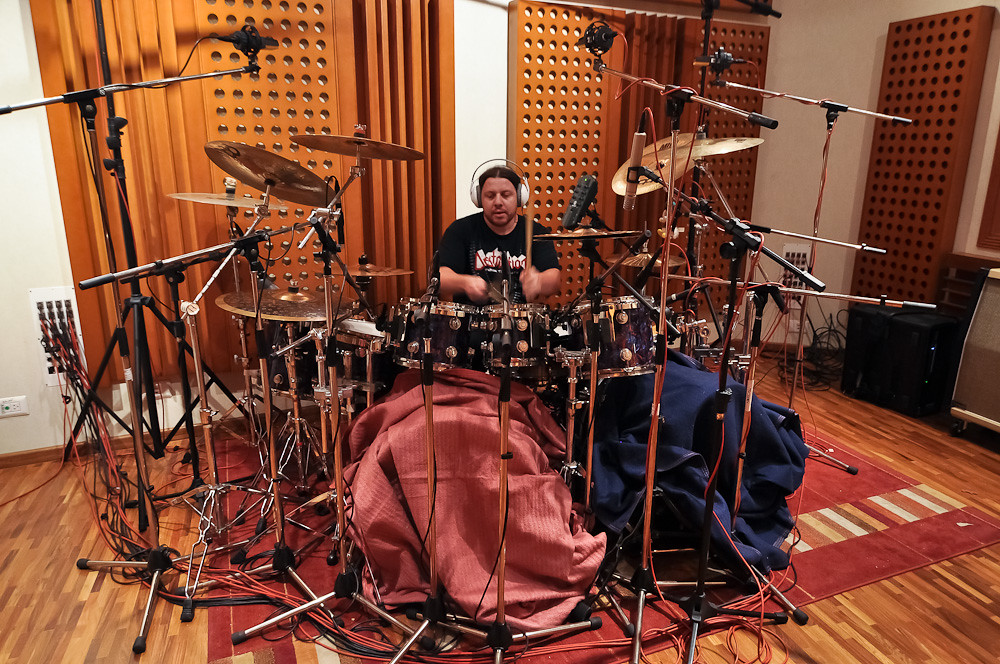
Image Source: producelikeapro.com
Setting Up Your Space for Success
Your recording environment is the first and perhaps most crucial element in capturing good drum sounds. Even the best microphones and preamps will struggle in a poor acoustic space.
Choosing the Right Room
Not all rooms are created equal when it comes to sound. You’re looking for a space that doesn’t have too much natural echo or flutter.
- Avoid Square Rooms: Square rooms can create standing waves, which cause certain frequencies to sound much louder or quieter than others. This leads to an uneven and unpleasant sound.
- Look for Irregular Shapes: Rooms with angled walls, bay windows, or nooks and crannies can help break up sound waves and reduce unwanted reflections.
- Consider Room Size: A larger room generally provides a more natural and open sound. However, very large rooms can sometimes have too much “boom.” A medium-sized room with some furniture is often ideal.
- Minimize Hard Surfaces: Hard, flat surfaces like bare walls, glass, and tile floors reflect sound. The more soft, absorbent materials you have, the better. Think carpets, curtains, sofas, and even strategically placed blankets.
Acoustic Treatment: Your Secret Weapon
Acoustic treatment doesn’t mean building a professional studio. It’s about controlling the sound in your room.
DIY Acoustic Treatment
You can make a big difference with simple, DIY drum recording solutions.
- Blankets and Comforters: Hang thick blankets or comforters on walls, especially behind the drum kit and on side walls. This is a fantastic way to absorb sound and reduce reflections. Use temporary stands or even nails (if you don’t mind small holes) to hang them.
- Mattresses: An old mattress can be a highly effective bass trap. Place it vertically in a corner.
- Moving Blankets: These are specifically designed for sound absorption and are relatively inexpensive. They can be draped over furniture or hung on walls.
- Furniture Placement: Arrange furniture to break up flat surfaces. A bookshelf filled with books, a sofa, or even a large potted plant can help diffuse sound.
- Rug Under the Kit: A thick rug under your drum kit will absorb some of the low-end energy that resonates from the kick drum and cymbals, preventing it from bouncing around the room.
Professional Acoustic Treatment (Optional, as Budget Allows)
If your budget permits, consider some basic acoustic panels.
- Bass Traps: These are crucial for controlling low frequencies. Place them in corners where bass frequencies tend to build up.
- Absorption Panels: Place these on the “reflection points” in your room. These are the spots on the walls and ceiling where sound bounces directly from the speakers to your ears (or from the drums to the microphones).
Essential Drum Recording Gear: Getting Started
You don’t need a truckload of expensive equipment to record drums. Start with the basics and expand as your skills and needs grow. This is where budget drum recording gear really shines.
Microphones: The Ears of Your Recording
Microphones are how you capture the sound of your drums. You can get surprisingly good results with a few well-chosen, affordable drum mics.
Minimal Drum Mic Placement Strategies
Starting with a minimal drum mic placement is often the best approach for beginners. You can achieve fantastic results with just a few mics.
- The “One-Mic” Method: This is the simplest approach. Place a condenser microphone in front of the drum kit, roughly 3-5 feet away and at cymbal height. Experiment with the exact position to capture a balanced sound of the entire kit. This method requires careful mic placement and a good-sounding room.
- The “Two-Mic” Method: This is a common starting point.
- Overhead: Use a stereo pair of condenser microphones (or a single stereo mic) placed above the kit, pointing down. This captures the overall sound, cymbals, and the stereo image of the drums.
- Kick Drum: Place a dynamic microphone inside or just in front of the kick drum’s resonant head to capture the low-end “thump.”
- The “Three-Mic” Method: This adds a bit more control.
- Overhead: As above, capturing the overall kit and cymbals.
- Snare Drum: A dynamic microphone placed above the snare, angled towards the drummer’s stick.
- Kick Drum: A dynamic microphone for the kick.
Recommended Affordable Drum Mics
When choosing affordable drum mics, look for well-known workhorses that offer good value.
| Microphone Type | Common Use Case | Recommended Affordable Options | Why It’s Good for Drums |
|---|---|---|---|
| Dynamic | Kick Drum, Snare Drum | Shure SM57, Shure Beta 57A, Sennheiser e609, Audix i5 | Durable, handle high SPLs (sound pressure levels), good for bright or percussive sounds. |
| Condenser | Overheads, Room Mics | Rode NT5 (pair), sE Electronics sE2200a II, AKG C214 (if budget allows) | Sensitive, capture detail and transients, good for cymbals and the overall kit sound. |
| Large Diaphragm Condenser | Room Mics, Kick (if carefully placed) | Audio-Technica AT2020, MXL 990 | Can capture a fuller sound, but may require more care with placement due to sensitivity. |
Specific Mic Placements for Common Drum Mics
- Kick Drum:
- Inside the drum: Place a dynamic mic just inside the kick drum, pointing towards the beater. This gives a punchy attack.
- Outside the drum: Place a dynamic mic a few inches from the resonant head. This offers a fuller, more “boomy” sound. You can even use two mics on the kick and blend them.
- Snare Drum:
- Top Head: Place a dynamic mic above the snare, angled towards the center. This captures the stick attack and body of the snare.
- Bottom Head (Optional): A dynamic mic placed underneath the snare, pointing up at the snares, will capture more “crack” and snare wire sizzle. Be mindful of phase if using top and bottom snare mics.
- Toms:
- Dynamic Mics: Similar to the snare, place dynamic mics above each tom, angled towards the center of the head.
- Distance: Aim for about 1-2 inches above the rim, pointing slightly down.
- Overheads:
- XY Technique: Place two cardioid condenser mics at 90 degrees, with their capsules as close as possible. This gives a strong mono-compatible stereo image.
- Spaced Pair (A/B): Place two microphones (often omnidirectional or cardioid) spaced apart above the kit. This can create a wider stereo image but can be less mono-compatible.
- Placement: Aim for the mics to capture a balance of the cymbals and the overall kit sound. The height and angle are crucial.
Audio Interface: Connecting Your Mics to Your Computer
An audio interface converts the analog signal from your microphones into a digital signal your computer can understand.
- Number of Inputs: Make sure your interface has enough XLR inputs for the number of microphones you plan to use simultaneously. For a basic drum recording setup, two to four inputs are often sufficient.
- Phantom Power: Condenser microphones require phantom power (+48V). Ensure your interface provides this.
- Preamps: The quality of the preamps affects the clarity and tone of your recording. Even budget interfaces now offer decent preamps.
Headphones: Monitoring Your Sound
You need good quality, closed-back headphones to monitor your recording without the sound bleeding into your microphones.
- Closed-back design: This is essential to prevent the headphone sound from being picked up by your microphones, especially the overheads.
- Comfort: You’ll be wearing them for extended periods, so comfort is key.
DAW (Digital Audio Workstation): Your Virtual Studio
Your DAW is the software you’ll use to record, edit, and mix your drum tracks.
- Popular Options: Pro Tools, Logic Pro X (Mac only), Cubase, Ableton Live, Reaper, Studio One. Many offer free trials or affordable versions.
- Features: Look for a DAW that allows multi-track recording, editing, and automation.
Cables and Stands: The Unsung Heroes
- XLR Cables: You’ll need good quality XLR cables to connect your microphones to your audio interface.
- Mic Stands: Sturdy microphone stands are essential for positioning your mics correctly. You’ll need at least as many stands as microphones. Boom stands offer more flexibility in positioning.
The Recording Process: Step-by-Step
Now that you have your gear, let’s get to the actual drum tracking tips.
Step 1: Set Up Your Drums
- Tune Your Drums: This is paramount. Well-tuned drums sound better before they’re even mic’d.
- Positioning: Place your drum kit in the best-sounding spot in your treated room. Ensure there’s enough space for you to play comfortably and for the microphones to be positioned effectively.
Step 2: Mic Placement and Gain Staging
This is where the art of acoustic drum recording truly begins.
- Start with Overheads: Position your overhead microphones first. This captures the overall sound and stereo image.
- Height: Experiment with height. Higher placement gives a wider stereo image and more cymbal sound. Lower placement captures more of the kit’s body but can be less balanced.
- Angle: Angle them down towards the kit.
- Add Kick and Snare: Place your kick and snare microphones next.
- Kick: Listen to the sound through headphones and adjust the mic’s position inside or outside the drum for the desired thump and attack.
- Snare: Aim for a good balance of the snare drum’s tone and the stick’s impact.
- Add Toms (If Using): Position mics on the toms for clarity.
- Gain Staging: This is crucial for a clean recording.
- Set Levels: Play each drum (or the entire kit) at a comfortable performance level and adjust the input gain on your audio interface so the signal is strong but not clipping (distorting). Aim for peaks around -12dB to -6dB on your DAW’s meters.
- Headroom: Leaving some “headroom” (space between the loudest signal and 0dBFS) is important for mixing and prevents clipping.
Step 3: Recording Your Tracks
- Arm Tracks: In your DAW, arm each track for recording.
- Count-in: Always use a count-in to ensure your tempo is locked.
- Performance: Play with energy and focus. It’s often best to record the entire kit at once, but you can also record individual drum parts (like kick, snare, toms, and cymbals) on separate tracks if you have enough inputs. This is known as “multitracking.”
- Listen Critically: Pay attention to how the drums sound in your headphones. Are there any unwanted noises? Is the balance good?
Step 4: Editing and Mixing Basics
Once you have your raw recordings, the real work of making them sound great begins.
- Comping (Compositing): If you recorded multiple takes, select the best parts of each take and “comp” them together to create a perfect performance.
- Quantizing: If your timing is a little off, you can use quantization to snap the drum hits to the grid. Use this sparingly and subtly for a more natural feel.
- Editing for Tightness: Remove any unwanted noise between drum hits, like cymbal wash when you only want the snare to be heard.
- Gating: A gate can help clean up bleed between microphones, especially on toms. It mutes the signal when it falls below a certain threshold.
- EQ (Equalization): This is used to shape the tone of each drum.
- High-Pass Filter (HPF): Use an HPF to remove unwanted low-end rumble from most drum mics, except the kick.
- Boosting and Cutting: Boost frequencies to emphasize desirable qualities (e.g., the “thwack” of the snare) and cut frequencies to remove unwanted ones (e.g., boxiness in the toms).
- Compression: This evens out the dynamics of the drum hits, making them sound more consistent and punchy.
- Attack: Controls how quickly the compressor reacts.
- Release: Controls how quickly the compressor stops compressing.
- Threshold: Sets the level at which compression begins.
- Ratio: Determines how much the signal is compressed.
- Reverb and Delay: These effects add space and depth to the drums.
- Reverb: Mimics the sound of a room or hall.
- Delay: Creates echoes. Use these subtly to enhance the natural sound of your drums, not to mask poor recordings.
- Panning: Place individual drum elements in the stereo field. Typically, the kick and snare are centered, toms are panned to the sides, and cymbals are placed accordingly.
Advanced Techniques and Considerations
As you gain experience, you can explore more advanced methods to elevate your home studio drums.
Drum Overdubbing and Triggering
- Overdubbing: If you don’t have enough inputs or prefer more control, you can record drums one piece at a time (kick, snare, hi-hat, toms, cymbals). This requires a good click track and excellent timing from the drummer.
- Drum Triggers: For a consistent sound or when recording in a less-than-ideal acoustic space, you can use drum triggers. These are small sensors attached to drums that send a signal to a drum module or sampler, allowing you to replace the acoustic sound with a digital sample. This is common in bedroom drummer recording for a polished sound.
Room Mics: Capturing the Space
If you have the inputs and space, adding room microphones can bring a sense of depth and realism to your acoustic drum recording.
- Placement: Place microphones further back in the room, further away from the kit. Experiment with mono room mics placed in front of the kit or stereo pairs placed further back.
- Sound: Room mics capture the natural ambience of your recording space and add a sense of size. They are often compressed heavily to bring out the room sound.
Sample Replacement (Augmentation)
Even with great mics and a good room, you might want to add a touch of professional polish.
- Purpose: Drum sample replacement involves using specialized software to layer or completely replace the recorded drum sound with high-quality studio samples.
- How it Works: Software analyzes the original drum hit and triggers a corresponding sample. This is often used for the kick and snare to add punch, consistency, and sonic character.
Frequently Asked Questions (FAQ)
Q1: What is the most important piece of gear for recording drums at home?
A1: The most important piece of gear is your acoustic space. Even the best microphones and gear will sound poor in a bad-sounding room. Proper room treatment and careful mic placement are crucial.
Q2: Can I record drums with just one microphone?
A2: Yes, you absolutely can record drums with just one microphone. This requires careful mic placement to capture a balanced representation of the entire kit.
Q3: What are the best affordable drum mics for beginners?
A3: For kick and snare, dynamic mics like the Shure SM57 or Sennheiser e609 are excellent choices. For overheads, a matched pair of small-diaphragm condenser microphones like the Rode NT5 or Audio-Technica AT2020 are great budget options.
Q4: How many microphones do I need to record drums at home?
A4: You can start with as few as one or two microphones and gradually increase as your needs and budget allow. Many professional recordings have been made with surprisingly few microphones.
Q5: How do I deal with sound bleeding between microphones?
A5: Sound bleed is a natural part of acoustic drum recording, especially with minimal mic placement. You can manage bleed through careful mic placement (using the null points of directional mics), acoustic treatment, and in the mix stage with gates and EQ.
Q6: What is gain staging, and why is it important?
A6: Gain staging is the process of setting the input levels for each piece of audio equipment in your signal chain. It’s important to ensure that your signal is strong enough to be clear but not so strong that it clips (distorts). Proper gain staging prevents distortion and provides optimal signal quality for mixing.
Q7: How important is drum tuning for recording?
A7: Drum tuning is extremely important. Well-tuned drums will sound significantly better before any processing is applied, making your job much easier and resulting in a superior final product.
By focusing on your acoustic space, choosing the right budget drum recording gear, and employing smart drum tracking tips, you can achieve fantastic-sounding acoustic drum recording in your own home. Don’t be afraid to experiment, listen critically, and most importantly, have fun creating music!